Why Grout and Caulk Failures Matter More Than They Look
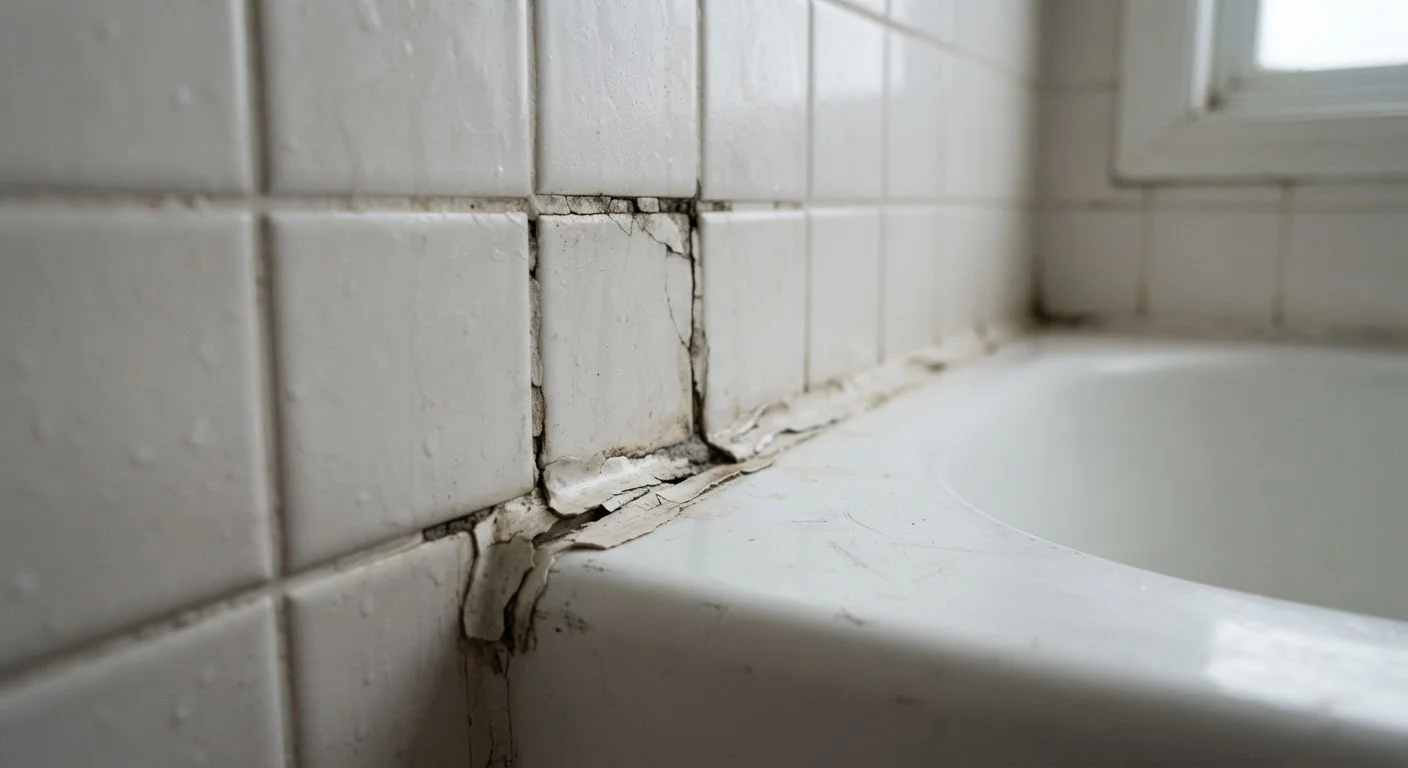
A hairline crack in bathroom grout or a gap where caulk has pulled away from the tub may seem like a cosmetic nuisance. In reality, these are open channels through which water travels every time someone showers. Over weeks and months, that moisture saturates the backer board or drywall behind the tile, promotes mold growth, and can rot the subfloor beneath - damage that is far more expensive to fix than the original crack.
Understanding why each material fails helps you choose the right repair. Cement-based grout is rigid and porous. It bonds tile to tile but is not designed to flex. Movement joints - the corners where a tub meets a tile wall, or where a floor meets a wall - shift subtly with temperature changes and structural settling. Grout in those locations always cracks eventually. That is exactly why those spots require flexible silicone caulk, not grout. If you have ever seen grout crumbling in a tub corner, you have seen this mismatch in action. For a deeper look at how caulk compares to other sealants around the home, see our guide to caulk versus weatherstripping.
As part of foundational home maintenance habits, bathroom tile inspection deserves a place on your seasonal checklist - it takes less than five minutes and can save thousands.
Soft Walls or Loose Tiles Need Professional Evaluation
If pressing on a tile causes movement, or if the wall surface feels soft or spongy behind the tile, water has likely already damaged the substrate. Applying new grout or caulk over compromised backer board will not solve the underlying problem. Have a licensed contractor assess the extent of damage before proceeding with any surface repair.
How to Inspect Your Bathroom Tile, Grout, and Caulk
Before you buy any materials, do a methodical walkthrough of every tiled surface. Use good lighting - a flashlight or your phone's torch helps reveal shallow cracks that flat overhead light obscures.
- Grout lines: Look for cracks, crumbling, discoloration, or sections that have gone hollow. Press gently; if a tile moves or sounds different when tapped, the bond beneath may have failed.
- Caulk beads: Inspect corners, the tub-to-wall seam, and the floor-to-wall base. Caulk that has shrunk, cracked, gone brown, or separated from either surface needs replacement - not patching over.
- Tile surface: Chips and cracks in tile face glaze can allow moisture in, though tile damage is less common than grout or caulk failure.
- Walls behind tiles: Any soft or spongy feeling when you press a tile signals that water has already reached the substrate. This may require professional assessment.
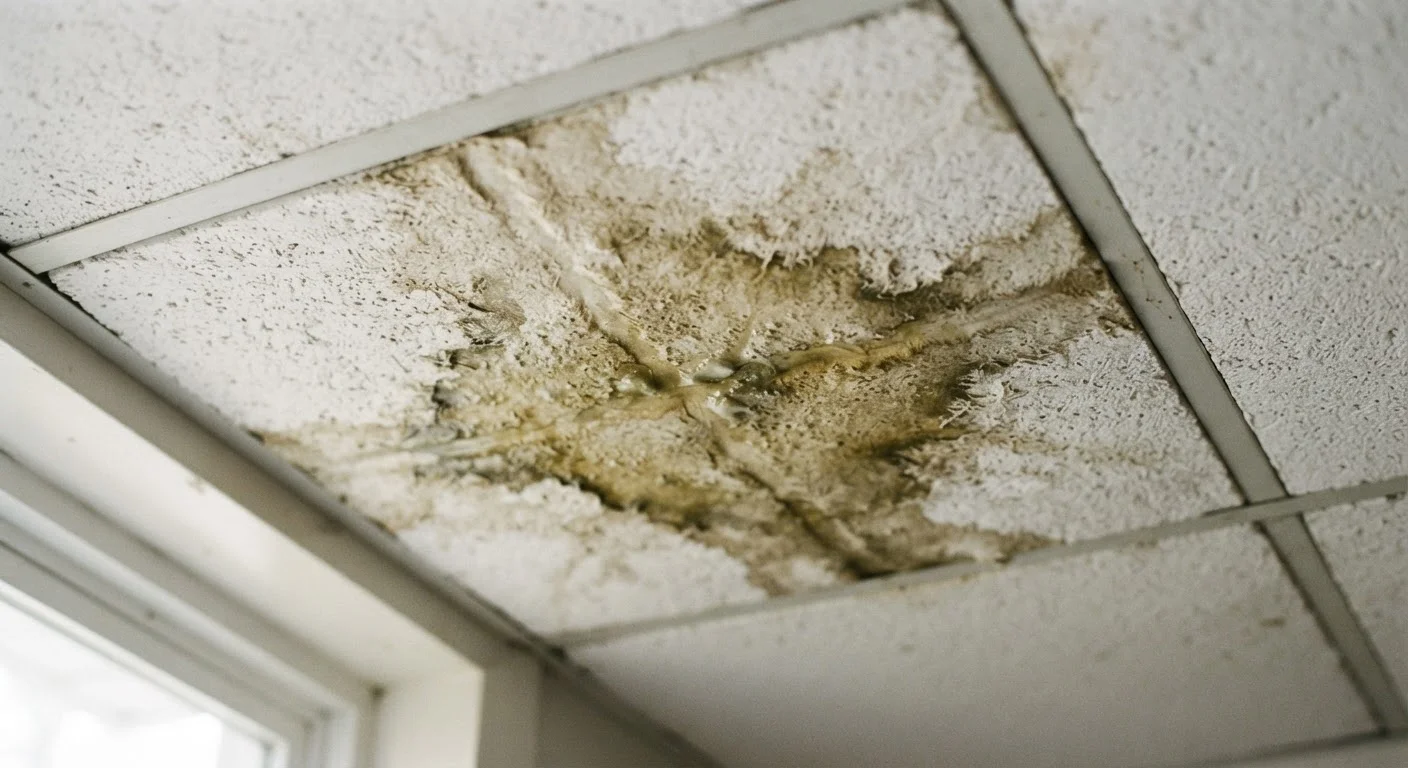
If you notice staining on ceilings below a bathroom, soft spots in flooring, or a persistent musty smell, moisture infiltration may already be underway. Our article on detecting a slow water leak walks through those warning signs in detail.
What you will need
Step-by-Step: Regrouting and Recaulking Your Bathroom
Once you have identified which areas need attention, follow these steps in order. Attempting to apply new material over failing old material is the single most common mistake homeowners make - it never holds. For more on why that shortcut backfires, see our companion piece on what homeowners get wrong about fixing grout.
Grout saw or oscillating multi-tool
Removes old, cracked grout cleanly without damaging surrounding tile.
Rubber grout float
Spreads and presses new grout into tile joints at the correct angle.
Utility knife
Scores and cuts out deteriorated caulk beads along joints and seams.
Caulk gun
Delivers a controlled, even bead of silicone caulk along movement joints.
Grout sealer
Penetrates cured grout to resist moisture intrusion and staining after repair.
Isopropyl alcohol and clean cloths
Cleans joint surfaces of soap residue and adhesive film before recaulking.
Remove old grout from damaged lines
Use a grout saw or oscillating multi-tool with a grout-removal blade to rake out cracked or crumbling grout to a depth of at least 3 mm (roughly 1/8 inch). Work slowly to avoid chipping adjacent tile edges. Vacuum debris thoroughly - dust prevents new grout from bonding properly.
Cut out and clean away old caulk
Score along both edges of the caulk bead with a utility knife, then pull the strip free. Use a plastic scraper or dedicated caulk remover tool to clean the joint surface. Follow up with isopropyl alcohol on a cloth to remove soap residue and any adhesive film. Both surfaces must be completely dry before you proceed - allow at least 24 hours after cleaning, or use a fan to speed drying.
Mix and apply new grout
Follow the manufacturer's ratio for mixing powdered grout with water - consistency should resemble peanut butter. Use a rubber float held at a 45-degree angle to press grout diagonally across the lines, filling each joint completely. Work in sections of roughly two to three square feet at a time. Once the grout has hazed (usually 15-30 minutes), use a damp sponge in circular motions to clean the tile face, rinsing the sponge frequently.
Allow grout to cure fully
Keep the newly grouted surface dry for the time specified on the product packaging - commonly 24 to 72 hours depending on the grout formulation and humidity. Avoid heavy use of the shower during this period. Once cured, apply a penetrating grout sealer to protect porous grout from moisture and staining.
Apply new silicone caulk at movement joints
Load a tube of 100% silicone caulk (mold-resistant formulation is a sound choice for wet areas) into a caulk gun. Cut the tip at a slight angle to produce a bead sized to fill the joint. Apply steady, even pressure as you draw the gun along the joint in one continuous pass. Immediately smooth the bead with a wet finger or caulk-finishing tool. Wipe away excess with a damp cloth before it skins over.
Cure caulk before exposing to water
Silicone caulk typically requires 24 hours to skin over and up to 72 hours for a full cure in average bathroom humidity. Check your product's instructions. Do not use the shower or allow water to contact fresh caulk until the cure time has elapsed.
Match Grout Color Before You Buy
Bring a photo of your tile or, if possible, a small sample of existing grout to the hardware store. Most grout manufacturers offer color-match charts, and selecting the right shade now prevents a patchwork appearance later. When in doubt, choose a tone slightly lighter than what you see on dry grout - grout darkens when wet and often dries lighter than it looks in the bag.
Keeping It Sound: Maintenance After the Repair
Fresh grout and caulk are not permanent. Plan to visually inspect all bathroom seams every six to twelve months. Run your eye along caulk lines after the surface is wet - gaps show up more clearly on a damp surface. Reapply a grout sealer annually on porous, unglazed grout to extend its resistance to moisture and staining.
Good ventilation dramatically slows the deterioration of both materials. Run the exhaust fan during and for at least fifteen minutes after every shower; if your bathroom lacks adequate ventilation, a window or upgraded fan makes a measurable difference in how long repairs last.
Deferred maintenance rarely saves money - minor grout cracks left for a year become water-damaged backer board left for five. A small investment of time each season keeps bathroom tile repairs in the DIY range rather than the contractor range.